
- 분류 전체보기 (110)

| 일 | 월 | 화 | 수 | 목 | 금 | 토 |
|---|---|---|---|---|---|---|
| 1 | ||||||
| 2 | 3 | 4 | 5 | 6 | 7 | 8 |
| 9 | 10 | 11 | 12 | 13 | 14 | 15 |
| 16 | 17 | 18 | 19 | 20 | 21 | 22 |
| 23 | 24 | 25 | 26 | 27 | 28 | 29 |
| 30 | 31 |
- Linux
- 라즈베리파이
- STM32
- c#
- Visual Studio Code
- raspberrypi
- QEMU
- UART
- yocto project
- 리눅스
- WPF
- 디버깅
- Debug
- atmel
- avr-gcc
- AVR
- bare metal
- esp32
- QT
- Visual Studio
- MVVM
- vscode
- C++
- nucleo
- buildroot
- 아두이노
- Raspberry
- Arduino
- yocto
- AArch64
- Today
- Total
임베디드를 좋아하는 조금 특이한 개발자?
[Yocto Project] QT6 개발 - 4 : systemd 서비스로 부팅 후 자동 실행 본문
[Yocto Project] QT6 개발 - 4 : systemd 서비스로 부팅 후 자동 실행
Gordon_ 2026. 7. 29. 21:01- 개발 환경
개발 보드 : Raspberrypi 4
WSL2 (Ubuntu 24.04 LTS)
Yocto Project : Scarthgap
- 소스 코드
https://github.com/MainForm/yocto_rpi4_qt6_template
GitHub - MainForm/yocto_rpi4_qt6_template
Contribute to MainForm/yocto_rpi4_qt6_template development by creating an account on GitHub.
github.com
- 이전 포스트
https://littlebitodd-developer.tistory.com/109
[Yocto Project] QT6 개발 - 3 : QT 애플리케이션 레시피 작성
- 개발 환경개발 보드 : Raspberrypi 4WSL2 (Ubuntu 24.04 LTS)Yocto Project : Scarthgap- 소스 코드https://github.com/MainForm/yocto_rpi4_qt6_template GitHub - MainForm/yocto_rpi4_qt6_templateContribute to MainForm/yocto_rpi4_qt6_template developme
littlebitodd-developer.tistory.com
1. 서론
일반적인 상용 리눅스(Ubuntu 등)은 사용자가 원하는 프로그램을 실행하기 위해 Shell이 실행되는 것이 일반적입니다. 하지만, 대부분의 임베디드 시스템은 시스템이 부팅 후 자동적으로 애플리케이션이 실행되어 서비스를 제공하고 있습니다. 그러므로 이번 포스트에서는 QT 애플리케이션을 Linux 부팅후 자동적으로 실행할 수 있도록 systemd 서비스를 추가하는 방법에 대해서 알아보도록 하겠습니다.
2. systemd 서비스 파일 추가
# systemd 서비스 파일 생성
touch ./sources/meta-rpi4-qt6-template/recipes-qt/qt6-hello-world/files/qt6-hello-world.service
- qt6-hello-world.service
[Unit]
Description=Qt 6 HelloWorld demo
After=systemd-user-sessions.service

[Service]
Type=simple
Environment=QT_QPA_PLATFORM=linuxfb
Environment=QT_QPA_GENERIC_PLUGINS=libinput
ExecStart=/usr/bin/appqt6-hello-world
Restart=on-failure
RestartSec=2

[Install]
WantedBy=multi-user.target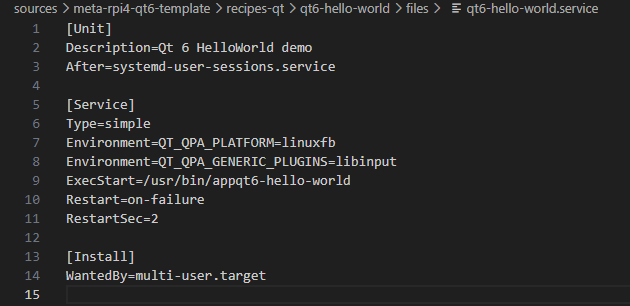
- Description=Qt 6 HelloWorld demo
해당 서비스에 대한 설명입니다. - After=systemd-user-sessions.service
해당 서비스의 실행 순서를 "systemd-user-sessions.service" 서비스 이후에 실행하라는 의미입니다.
하지만 의존성은 없습니다. 예를들어 After로 지정한 서비스가 없는 경우, After로 지정한 서비스가 실행 실패한 경우에도 이 서비스는 실행됩니다.
만약 의존성을 추가해야하는 경우 Requires 속성을 추가해야합니다. - Type=simple
가장 기본적인 서비스 형식입니다.
ExecStart 로 지정한 프로그램의 실행 여부로 서비스가 실행 중인지 판단합니다. - Environment=QT_QPA_PLATFORM=linuxfb
서비스를 실행할 때 추가적으로 지정할 환경 변수입니다.
해당 환경변수는 QT 애플리케이션이 사용할 PLATFORM를 설정합니다. - Environment=QT_QPA_GENERIC_PLUGINS=libinput
해당 환경 변수는 QT 애플리케이션에서 사용할 입력 플러그인을 설정합니다.
저의 경우 터치 디스플레이를 사용하므로 libinput을 지정하였습니다. - ExecStart=/usr/bin/appqt6-hello-world
이 서비스에서 실행할 프로그램을 지정합니다.
주의점으로 절대 경로를 사용하여야 합니다. - Restart=on-failure
이 서비스를 다시 실행할 조건을 설정합니다.
서비스가 비정상적으로 종료된 경우(return 값이 0이 아닌 경우)에 해당 서비스를 재시작합니다. - RestartSec=2
2초 이 서비스를 다시 재시작합니다. - WantedBy=multi-user.target
이 서비스를 enable할때 추가할 target을 지정합니다.
3. 레시피에 systemd 설정 추가
- qt6-hello-world_1.0.bb
SUMMARY = "Simple Qt 6 HelloWorld example"
DESCRIPTION = "A full-screen Qt 6 example application that renders HelloWorld in the center of the display."
LICENSE = "MIT"
LIC_FILES_CHKSUM = "file://${COMMON_LICENSE_DIR}/MIT;md5=0835ade698e0bcf8506ecda2f7b4f302"

SRC_URI = " \
    file://qt6-hello-world \
    file://qt6-hello-world.service \
"

S = "${WORKDIR}/qt6-hello-world"

DEPENDS += " \
    qtbase \
    qtdeclarative \
    qtdeclarative-native \
"

inherit qt6-cmake systemd

SYSTEMD_SERVICE:${PN} = "qt6-hello-world.service"
SYSTEMD_AUTO_ENABLE:${PN} = "enable"

do_install:append() {
    install -d ${D}${systemd_system_unitdir}
    install -m 0644 ${WORKDIR}/qt6-hello-world.service ${D}${systemd_system_unitdir}/
}
4. 이미지 빌드
bitbake rpi4-qt6-image
5. 라즈베리파이 부팅
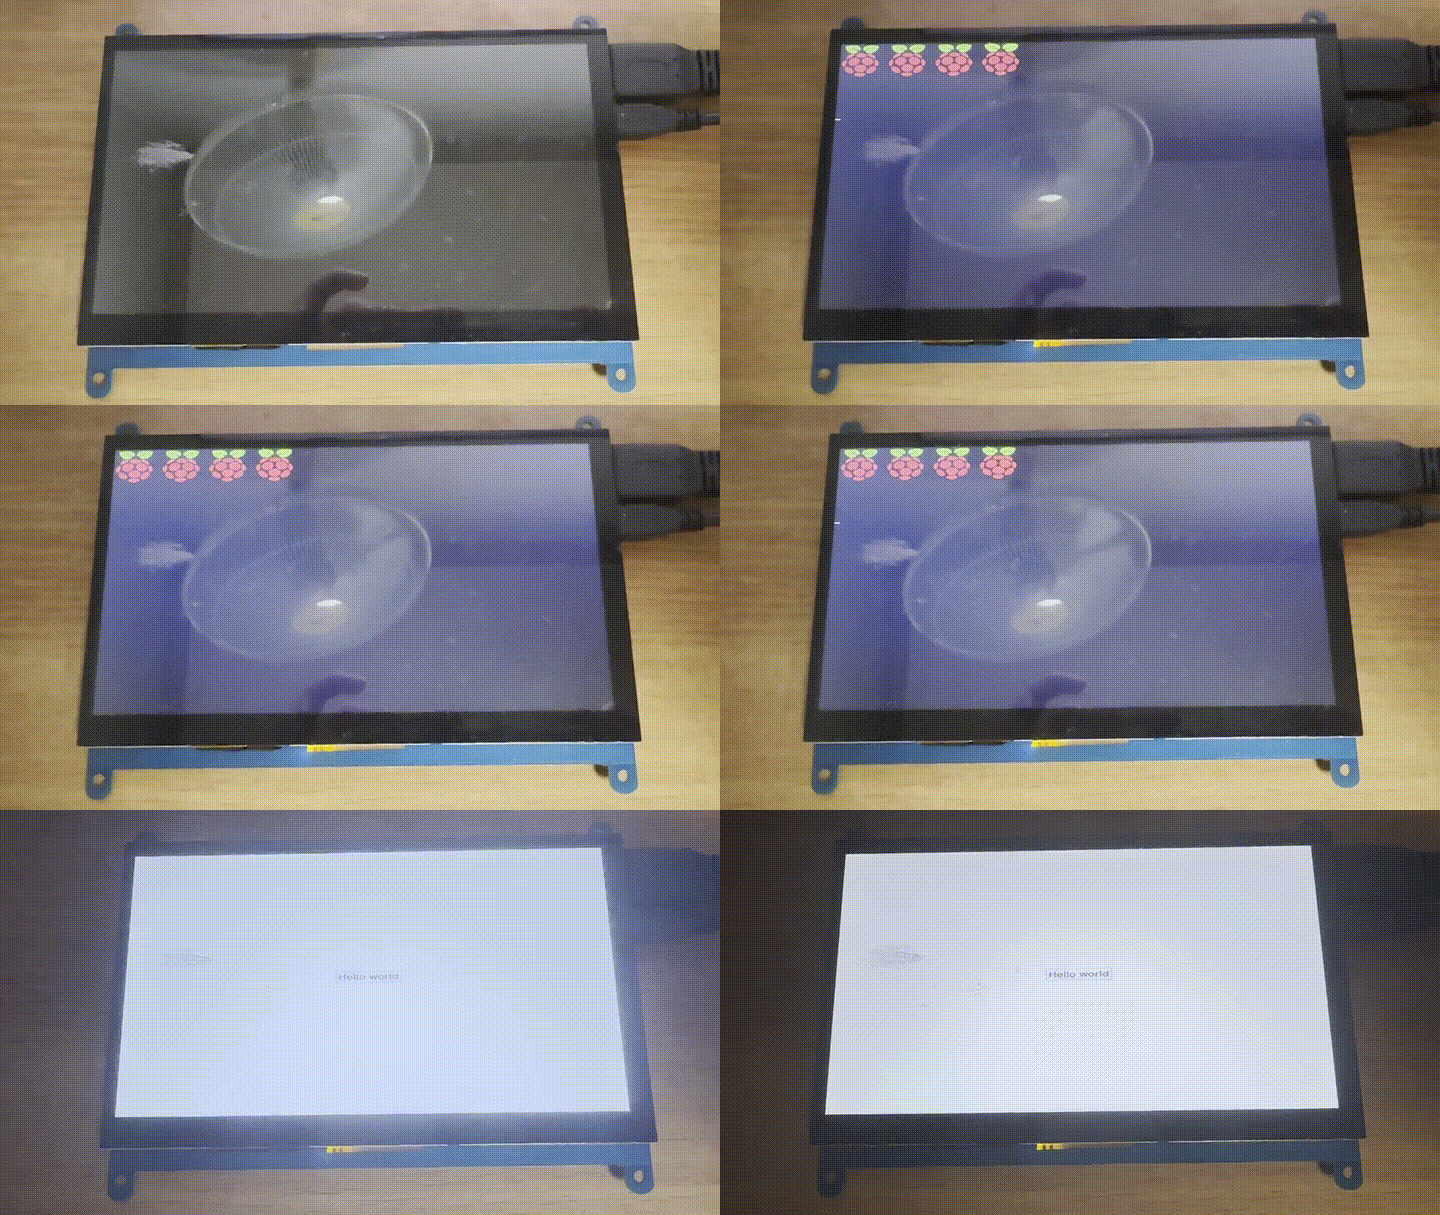
자동적으로 부팅된후 QT 어플리케이션이 실행되는 것을 확인할 수 있습니다.
6. 결론
이 포스트로 Yocto Project에서 QT 애플리케이션 개발하는 방법은 다 완료하였습니다. 하지만, QT 애플리케이션을 개발하면서 매번 이미지를 빌드한느 것은 매우 귀찮은 방법입니다. 그러므로, 개발 과정에서 현실적으로 쉽게 개발하는 방법에 대해서 알아 볼 것입니다.
'Embedded > Yocto Project' 카테고리의 다른 글
| [Yocto Project] QT6 개발 - 5 : QT Creator로 원격 개발 (0) | 2026.07.30 |
|---|---|
| [Yocto Project] QT6 개발 - 3 : QT 애플리케이션 레시피 작성 (0) | 2026.07.29 |
| [Yocto Project] QT6 개발 - 2 : QT Creator 개발 환경 구성 (0) | 2026.07.27 |
| [Yocto Project] QT6 개발 - 1 : 개발 환경 구축 (0) | 2026.07.23 |
| [Yocto Project] KAS를 통한 개발 환경 자동 구성 (0) | 2026.06.17 |