
- 분류 전체보기 (110)

| 일 | 월 | 화 | 수 | 목 | 금 | 토 |
|---|---|---|---|---|---|---|
| 1 | ||||||
| 2 | 3 | 4 | 5 | 6 | 7 | 8 |
| 9 | 10 | 11 | 12 | 13 | 14 | 15 |
| 16 | 17 | 18 | 19 | 20 | 21 | 22 |
| 23 | 24 | 25 | 26 | 27 | 28 | 29 |
| 30 | 31 |
- AVR
- WPF
- nucleo
- bare metal
- UART
- buildroot
- Debug
- c#
- AArch64
- esp32
- 디버깅
- raspberrypi
- STM32
- Visual Studio
- QEMU
- Linux
- Visual Studio Code
- Arduino
- C++
- 라즈베리파이
- avr-gcc
- atmel
- MVVM
- Raspberry
- 리눅스
- 아두이노
- vscode
- QT
- yocto project
- yocto
- Today
- Total
임베디드를 좋아하는 조금 특이한 개발자?
[Yocto Project] QT6 개발 - 3 : QT 애플리케이션 레시피 작성 본문
- 개발 환경
개발 보드 : Raspberrypi 4
WSL2 (Ubuntu 24.04 LTS)
Yocto Project : Scarthgap
- 소스 코드
https://github.com/MainForm/yocto_rpi4_qt6_template
GitHub - MainForm/yocto_rpi4_qt6_template
Contribute to MainForm/yocto_rpi4_qt6_template development by creating an account on GitHub.
github.com
- 이전 포스트
https://littlebitodd-developer.tistory.com/108
[Yocto Project] QT6 개발 - 2 : QT Creator 개발 환경 구성
- 개발 환경개발 보드 : Raspberrypi 4WSL2 (Ubuntu 24.04 LTS)Yocto Project : Scarthgap- 소스 코드https://github.com/MainForm/yocto_rpi4_qt6_template GitHub - MainForm/yocto_rpi4_qt6_templateContribute to MainForm/yocto_rpi4_qt6_template developme
littlebitodd-developer.tistory.com
1. 서론
이번 포스트에서는 QT 애플리케이션을 개발하기 위한 QT Creator의 설정을 마쳤습니다. 이번 포스트에서는 QT 애플리케이션을 Recipe으로 추가하여 자동적으로 이미지에 포함되도록 할 것입니다. 이를 통해 이미지를 설치하면 자동적으로 QT 애플리케이션을 실행할 수 있을 것입니다.
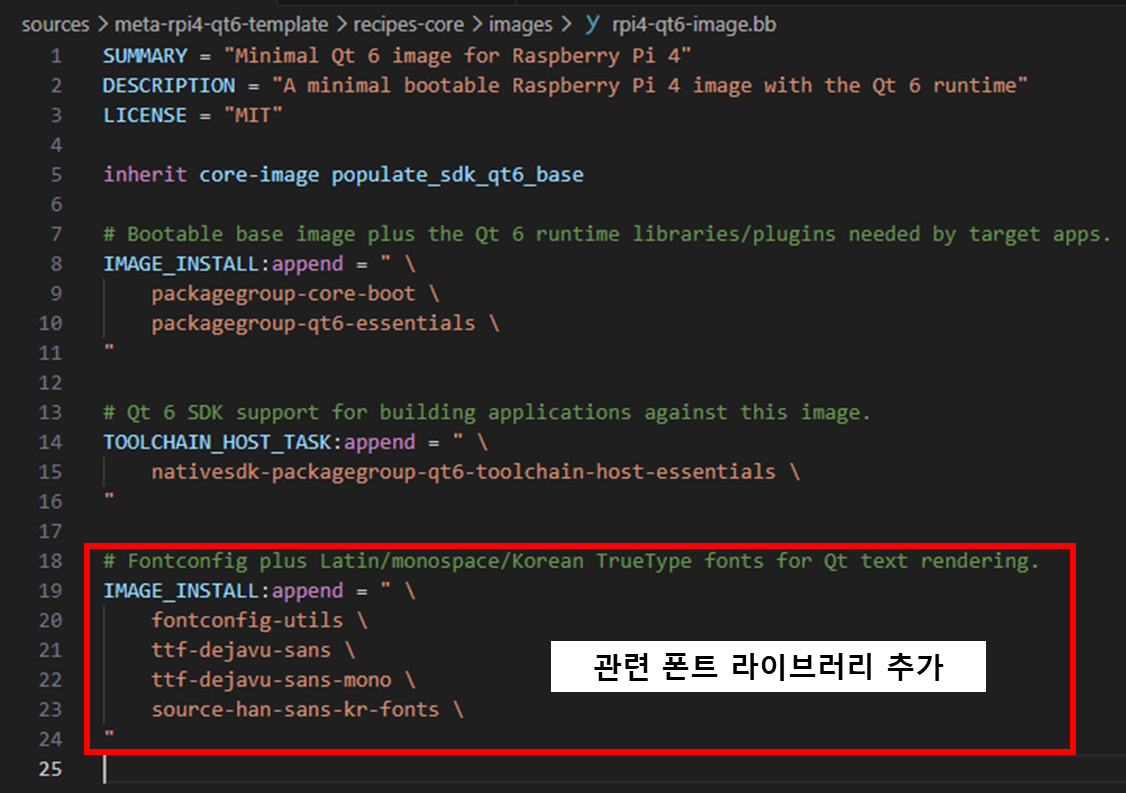
2. 폰트 추가
- rpi4-qt6-image.bb
SUMMARY = "Minimal Qt 6 image for Raspberry Pi 4"
DESCRIPTION = "A minimal bootable Raspberry Pi 4 image with the Qt 6 runtime"
LICENSE = "MIT"

inherit core-image populate_sdk_qt6_base

# Bootable base image plus the Qt 6 runtime libraries/plugins needed by target apps.
IMAGE_INSTALL:append = " \
    packagegroup-core-boot \
    packagegroup-qt6-essentials \
"

# Qt 6 SDK support for building applications against this image.
TOOLCHAIN_HOST_TASK:append = " \
    nativesdk-packagegroup-qt6-toolchain-host-essentials \
"

# Fontconfig plus Latin/monospace/Korean TrueType fonts for Qt text rendering.
IMAGE_INSTALL:append = " \
    fontconfig-utils \
    ttf-dejavu-sans \
    ttf-dejavu-sans-mono \
    source-han-sans-kr-fonts \
"
3. QT 애플리케이션 레시피 생성
# QT 애플리케이션 레시피을 위한 폴더 구조 생성
mkdir -p ./sources/meta-rpi4-qt6-template/recipes-qt/qt6-hello-world/files

# qt6-hello-world 레시피를 위한 bb 파일 생성
touch ./sources/meta-rpi4-qt6-template/recipes-qt/qt6-hello-world/qt6-hello-world_1.0.bb
3.1. QT6 QML 프로젝트 생성
# QT Creator 실행
qtcreator
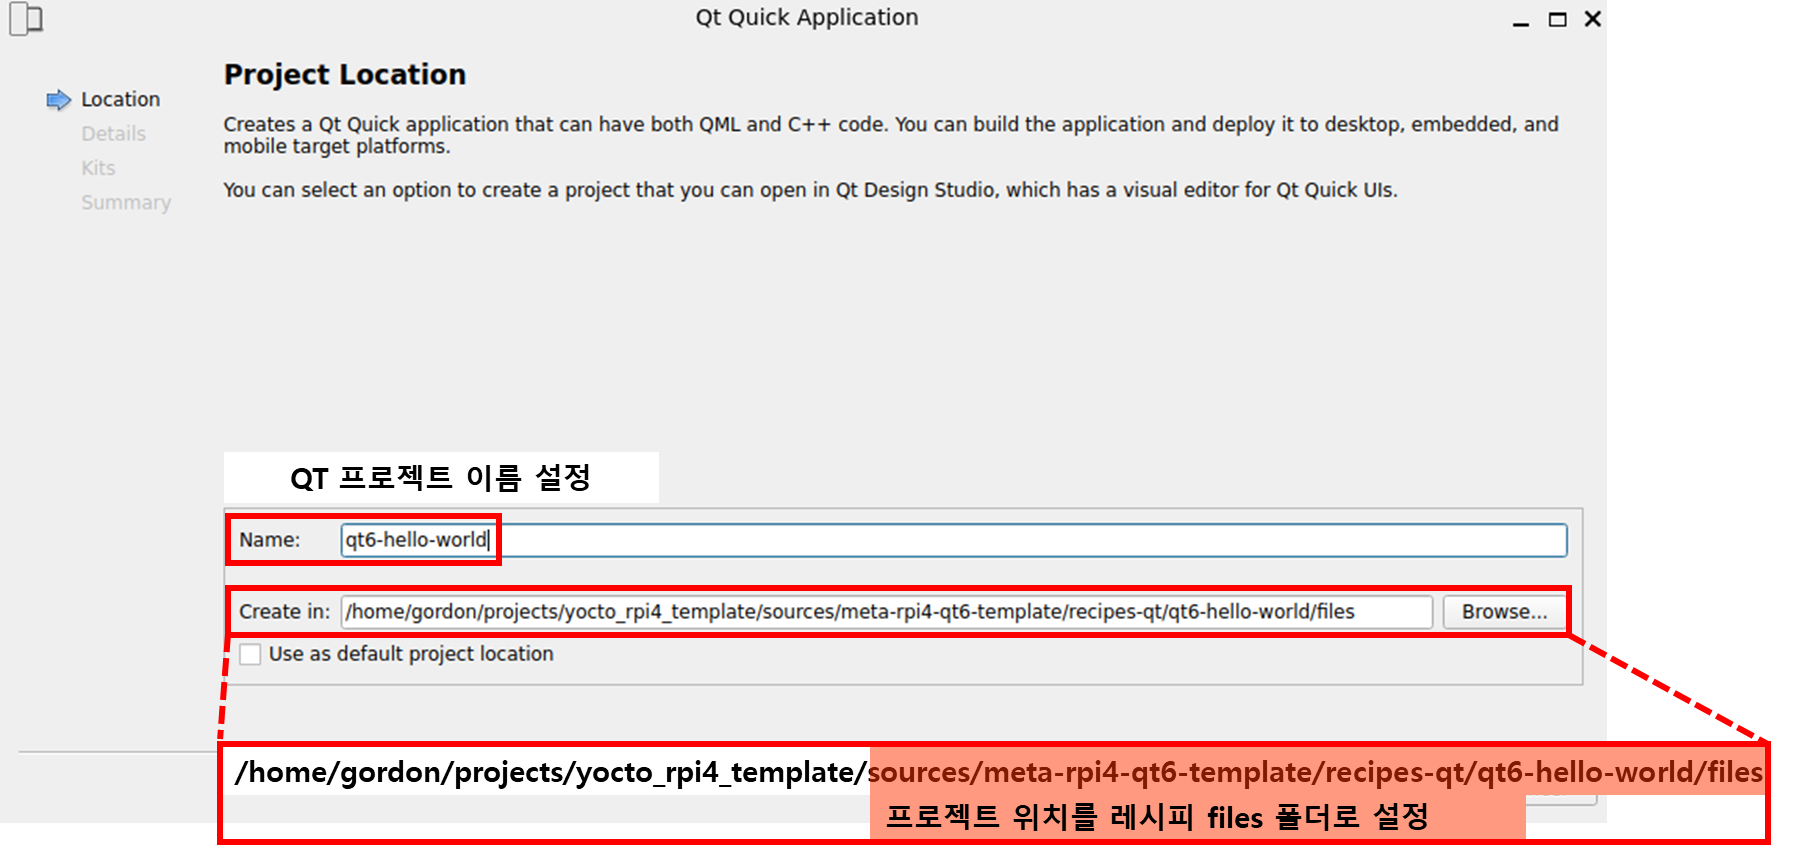
QT Creator에서 프로젝트 생성하는 방법은 이전 포스트의 "4.1. QT 프로젝트 생성"에 소개하였습니다.
단, 프로젝트의 이름과 생성 위치만 다릅니다.
프로젝트 위치를 위에서 추가한 레시피의 files 폴더 내에 생성해주어야 합니다.
3.2. Button 추가
import QtQuick
import QtQuick.Controls

Window {
    width: 1024
    height: 600
    visible: true
    title: qsTr("Hello World")

    Button {
        anchors.centerIn: parent
        text: qsTr("Hello world")
    }
}

3.3. 레시피 bb 파일 수정
위에서 생성한 "qt6-hello-world_1.0.bb" 파일 수정하여 QT 애플리케이션을 어떻게 빌드할지를 설정합니다.
- qt6-hello-world_1.0.bb
SUMMARY = "Simple Qt 6 HelloWorld example"
DESCRIPTION = "A full-screen Qt 6 example application that renders HelloWorld in the center of the display."
LICENSE = "MIT"
LIC_FILES_CHKSUM = "file://${COMMON_LICENSE_DIR}/MIT;md5=0835ade698e0bcf8506ecda2f7b4f302"

SRC_URI = " \
    file://qt6-hello-world \
"

S = "${WORKDIR}/qt6-hello-world"

DEPENDS += " \
    qtbase \
    qtdeclarative \
    qtdeclarative-native \
"

inherit qt6-cmake
- SRC_URI
어플리케이션에서 빌드할 때 필요한 파일 및 폴더를 지정하는 변수입니다.
- S
실제로 빌드하기 위한 소스코드의 위치를 설정합니다.
bitbake로 빌드하게 되면 SRC_URI에서 설정한 파일이 WORKDIR로 복사되게 됩니다.
그래서 이번 레시피에서는 qt6-hello-world를 빌드하기 위한 프로젝트로 설정했습니다.
- DEPENDS
이 레시피를 빌드하기 위해서 사전에 필요한 레시피를 설정합니다.
저희는 QT QML를 빌드하기 위해 3개의 레시피에 대해서 의존성을 가집니다.
- inherit qt6-cmake
이 레시피에서 QT QML 프로젝트를 빌드하기 위한 작업을 qt6-cmake.bbclass 파일로 부터 상속받습니다.
3.3. 레시피 bitbake로 빌드
만약 위 과정대로 잘 따라왔다면 정상적으로 bitbake 빌드가 성공하였을 것 입니다
# QT6 QML 애플리케이션 레시피 빌드
bitbake qt6-hello-world
4. QT 애플리케이션 레시피를 이미지에 포함
- rpi4-qt6-image.bb
SUMMARY = "Minimal Qt 6 image for Raspberry Pi 4"
DESCRIPTION = "A minimal bootable Raspberry Pi 4 image with the Qt 6 runtime"
LICENSE = "MIT"

inherit core-image populate_sdk_qt6_base

# Bootable base image plus the Qt 6 runtime libraries/plugins needed by target apps.
IMAGE_INSTALL:append = " \
    packagegroup-core-boot \
    packagegroup-qt6-essentials \
    qt6-hello-world \
"

# Qt 6 SDK support for building applications against this image.
TOOLCHAIN_HOST_TASK:append = " \
    nativesdk-packagegroup-qt6-toolchain-host-essentials \
"

# Fontconfig plus Latin/monospace/Korean TrueType fonts for Qt text rendering.
IMAGE_INSTALL:append = " \
    fontconfig-utils \
    ttf-dejavu-sans \
    ttf-dejavu-sans-mono \
    source-han-sans-kr-fonts \
"
이제 이미지를 bitbake로 재빌드 하면 해당 이미지에 QT 애플리케이션이 포함됩니다.
# 이미지 빌드
bitbake rpi4-qt6-image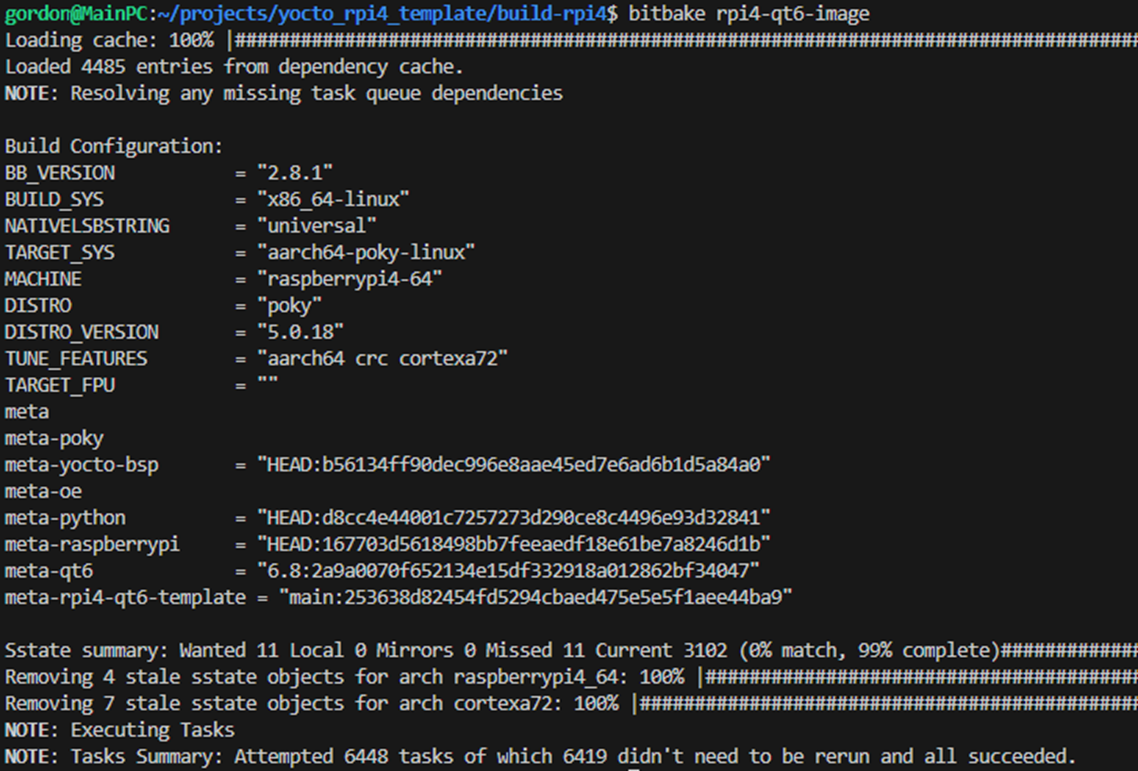
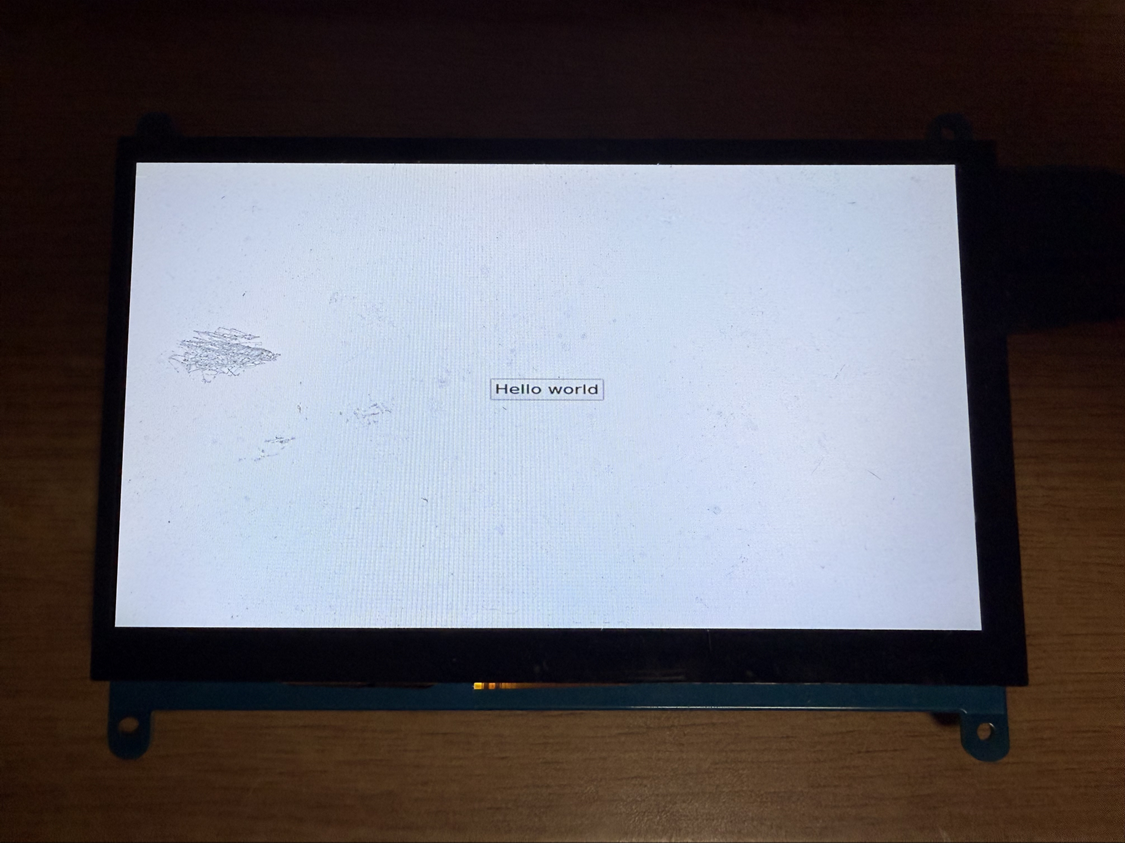
5. 프로그램 실행
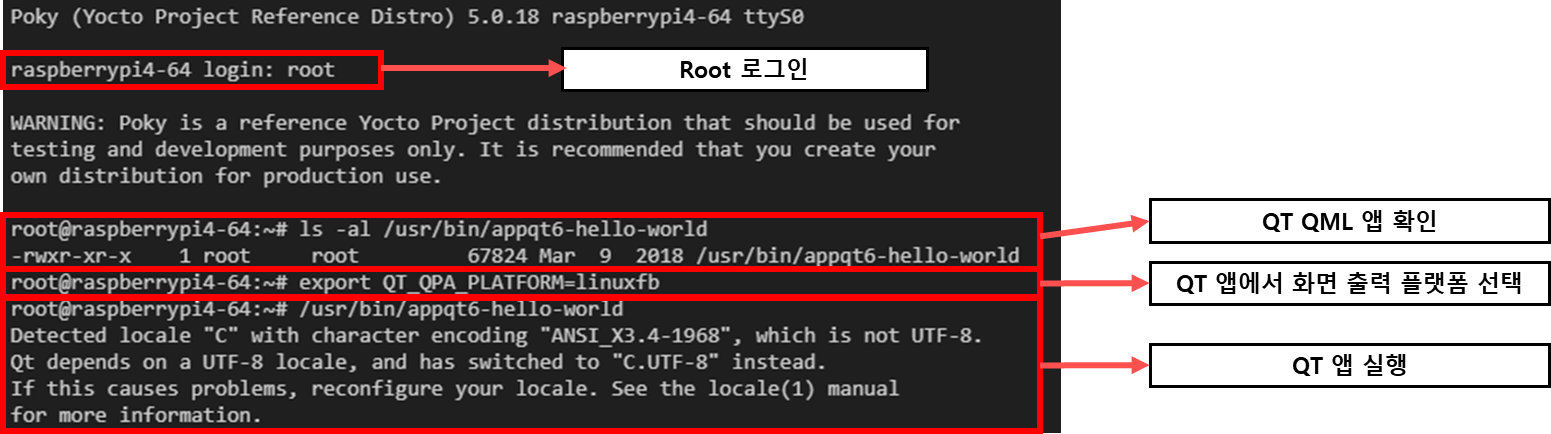
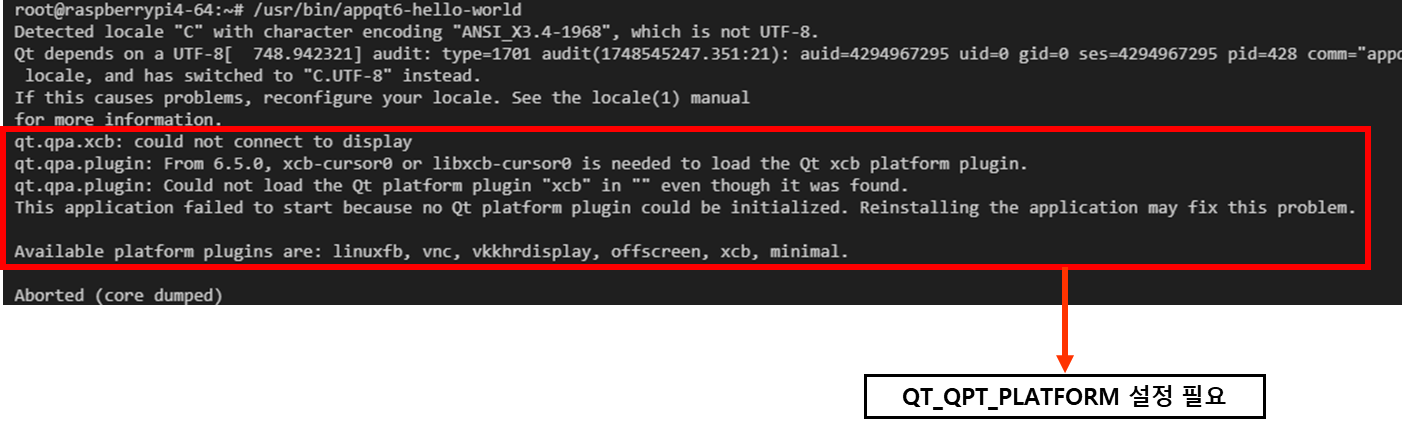
※주의)
QT_QPT_PLATFORM 을 설정하지 않으면 아래의 에러가 발생합니다.
6. 결론
실제 QT 애플리케이션까지 실행하는 것을 정상적으로 완료 하였습니다. 하지만, 매번 부팅 할때 마다 귀찮게 프로그램을 직접 실행해주어야하는 문제점이 있습니다. 하지만, 대부분의 임베디드 제품은 저절로 애플리케이션이 실행되는 것을 확인 할 수 있습니다. 다음 포스트에서는 systemd를 통해 서비스를 만들어 자동적으로 리눅스 부팅 후 애플리케이션이 실행되도록 설정하도록 하겠습니다.
'Embedded > Yocto Project' 카테고리의 다른 글
| [Yocto Project] QT6 개발 - 5 : QT Creator로 원격 개발 (0) | 2026.07.30 |
|---|---|
| [Yocto Project] QT6 개발 - 4 : systemd 서비스로 부팅 후 자동 실행 (0) | 2026.07.29 |
| [Yocto Project] QT6 개발 - 2 : QT Creator 개발 환경 구성 (0) | 2026.07.27 |
| [Yocto Project] QT6 개발 - 1 : 개발 환경 구축 (0) | 2026.07.23 |
| [Yocto Project] KAS를 통한 개발 환경 자동 구성 (0) | 2026.06.17 |