
- 분류 전체보기 (110)

| 일 | 월 | 화 | 수 | 목 | 금 | 토 |
|---|---|---|---|---|---|---|
| 1 | ||||||
| 2 | 3 | 4 | 5 | 6 | 7 | 8 |
| 9 | 10 | 11 | 12 | 13 | 14 | 15 |
| 16 | 17 | 18 | 19 | 20 | 21 | 22 |
| 23 | 24 | 25 | 26 | 27 | 28 | 29 |
| 30 | 31 |
- STM32
- QEMU
- AVR
- atmel
- vscode
- buildroot
- AArch64
- avr-gcc
- bare metal
- Visual Studio
- Linux
- Visual Studio Code
- C++
- esp32
- Debug
- c#
- 라즈베리파이
- Arduino
- QT
- Raspberry
- UART
- 리눅스
- WPF
- raspberrypi
- MVVM
- 디버깅
- yocto project
- yocto
- nucleo
- 아두이노
- Today
- Total
임베디드를 좋아하는 조금 특이한 개발자?
[Yocto Project] QT6 개발 - 1 : 개발 환경 구축 본문
- 개발 환경
개발 보드 : Raspberrypi 4
WSL2 (Ubuntu 24.04 LTS)
Yocto Project : Scarthgap
- 소스 코드
https://github.com/MainForm/yocto_rpi4_qt6_template
GitHub - MainForm/yocto_rpi4_qt6_template
Contribute to MainForm/yocto_rpi4_qt6_template development by creating an account on GitHub.
github.com
1. 서론
이번 포스트에서는 Yocto Project에서 QT6로 개발한 프로그램을 실행하기 위한 개발 환경을 구축하는 방법을 소개합니다. Yocto Project를 처음 접한 사람들은 대부분 그래서 어떻게 프로그램을 개발해야하는 건지 궁금할 것입니다. 특히, 터치 디스플레이를 사용하는 제품에서는 GUI를 어떻게 개발할지 궁금할 것 입니다. 대부분의 리눅스를 사용한 임베디드에서는 QT를 사용하는 것이 일반적입니다. 물론 최근들어 차동차 업계에서는 안드로이드를 사용하는 경우가 많아졌지만, 그래도 일반적인 환경에서는 QT는 많이 사용합니다. 또한 한개의 포스트로 소개하기에는 너무 방대한 크기이므로 여러개의 포스트로 나누어 설명드릴 예정입니다.
2. 선행 포스트
https://littlebitodd-developer.tistory.com/102
[Yocto Project] Github 배포하기 위한 프로젝트 구성
- 개발 환경개발 보드 : Raspberrypi 4WSL2 (Ubuntu 22.04 LTS)Yocto Project : Scarthgap - 소스 코드https://github.com/MainForm/yocto_rpi4_template GitHub - MainForm/yocto_rpi4_templateContribute to MainForm/yocto_rpi4_template development by creat
littlebitodd-developer.tistory.com
위 포스트에서 소개한 개발 환경을 바탕으로 진행합니다. 그러므로 반드시 먼저 위 포스트를 따라해주시기 바랍니다.
3. QT6 레이어 추가
- QT6 레이어 URL
https://layers.openembedded.org/layerindex/branch/scarthgap/layer/meta-qt6/
OpenEmbedded Layer Index - meta-qt6
scarthgap meta-qt6 Recipes for Qt6 modules Setup information Git repository git://code.qt.io/yocto/meta-qt6.git web repo (actual branch lts-6.8) Last commit: 1 month, 2 weeks ago (lts-6.8 branch) Maintainer Samuli Piippo email Dependencies The meta-qt6 l
layers.openembedded.org
QT6의 버전은 6.8을 사용할 것입니다. 6.8은 LTS 버전이므로 선택하였습니다.
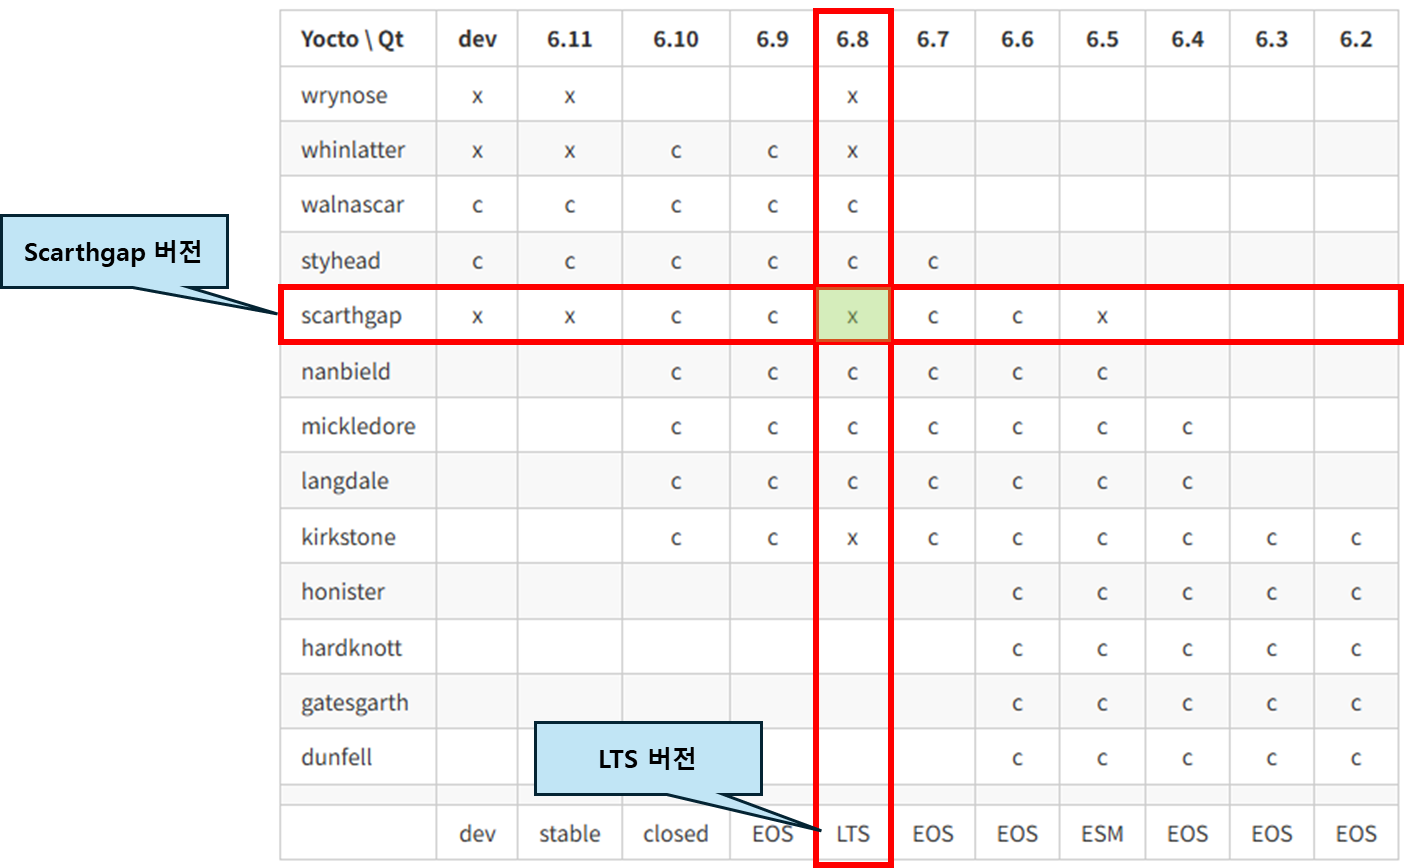
// submodule로 qt6 레이어 추가
git submodule add -b 6.8 https://code.qt.io/yocto/meta-qt6.git ./sources/meta-qt6
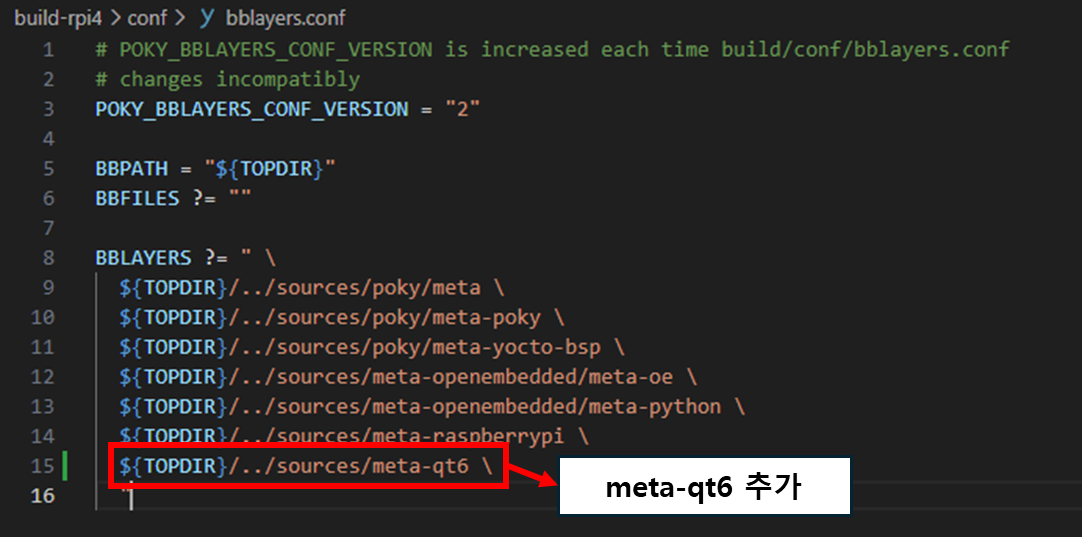
- build-rpi4/conf/bblayers.conf 파일
# POKY_BBLAYERS_CONF_VERSION is increased each time build/conf/bblayers.conf
# changes incompatibly
POKY_BBLAYERS_CONF_VERSION = "2"

BBPATH = "${TOPDIR}"
BBFILES ?= ""

BBLAYERS ?= " \
  ${TOPDIR}/../sources/poky/meta \
  ${TOPDIR}/../sources/poky/meta-poky \
  ${TOPDIR}/../sources/poky/meta-yocto-bsp \
  ${TOPDIR}/../sources/meta-openembedded/meta-oe \
  ${TOPDIR}/../sources/meta-openembedded/meta-python \
  ${TOPDIR}/../sources/meta-raspberrypi \
  ${TOPDIR}/../sources/meta-qt6 \
  "
아래 명령어로
# bitbake 명령어 활성화
source ./sources/poky/oe-init-build-env ./build-rpi4

# 현재 추가된 레이어 확인
bitbake-layers show-layers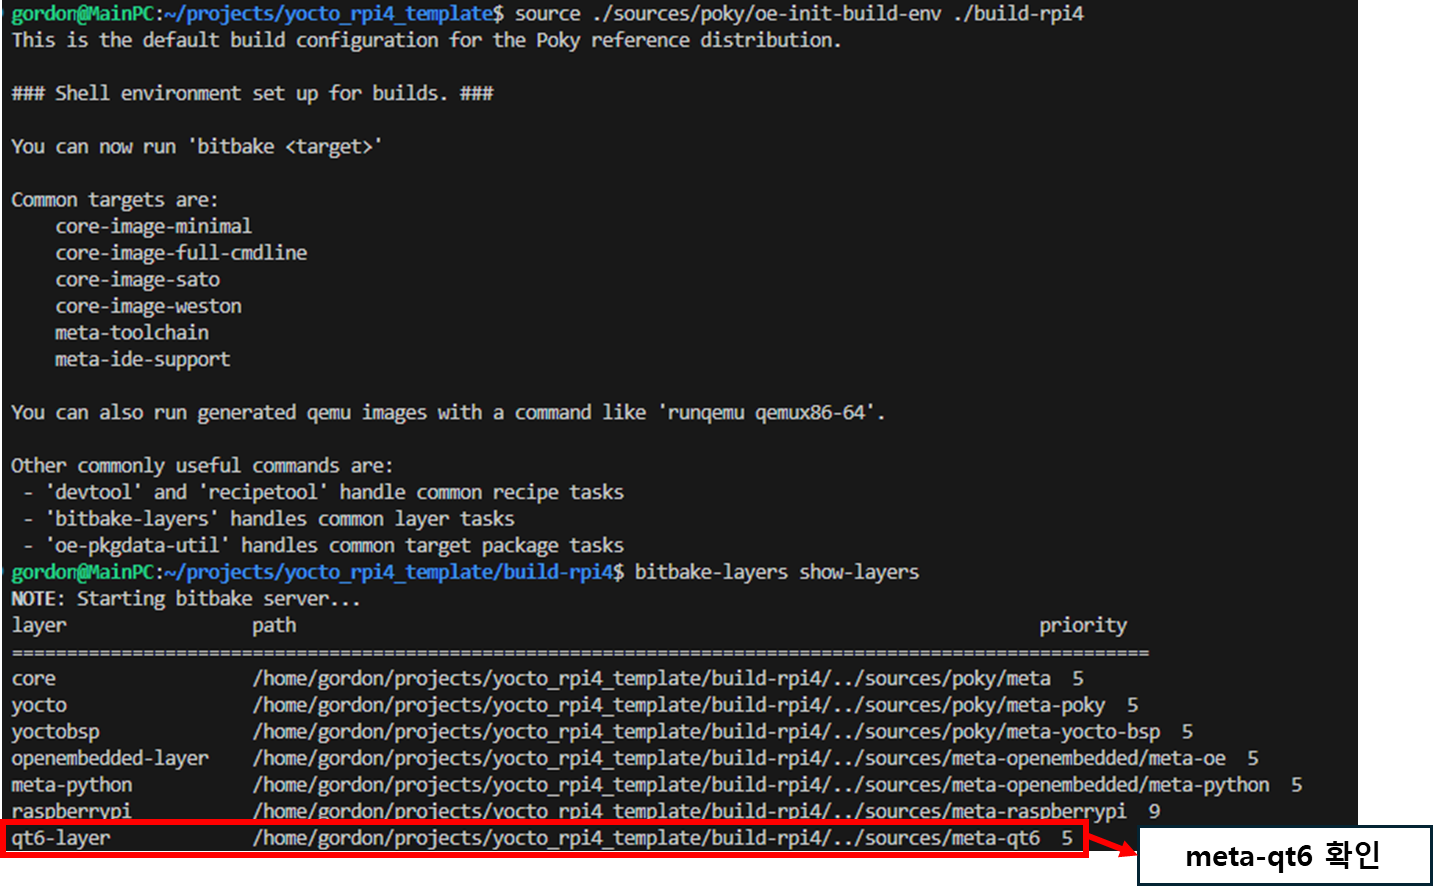
4. local.conf 수정
# Target the 64-bit Raspberry Pi 4 image.
MACHINE ??= "raspberrypi4-64"

# Required by some Raspberry Pi firmware packages.
LICENSE_FLAGS_ACCEPTED = "synaptics-killswitch"

# Keep the serial console available for board bring-up and debugging.
ENABLE_UART = "1"

# Disable the Raspberry Pi firmware's TV-style overscan margins.
# Without this, KMS may receive a video mode with 32px margins and the Qt
# framebuffer can appear scaled or blurry even when HDMI EDID is valid.
DISABLE_OVERSCAN = "1"

# Use systemd as the init system for the target image.
INIT_MANAGER = "systemd"
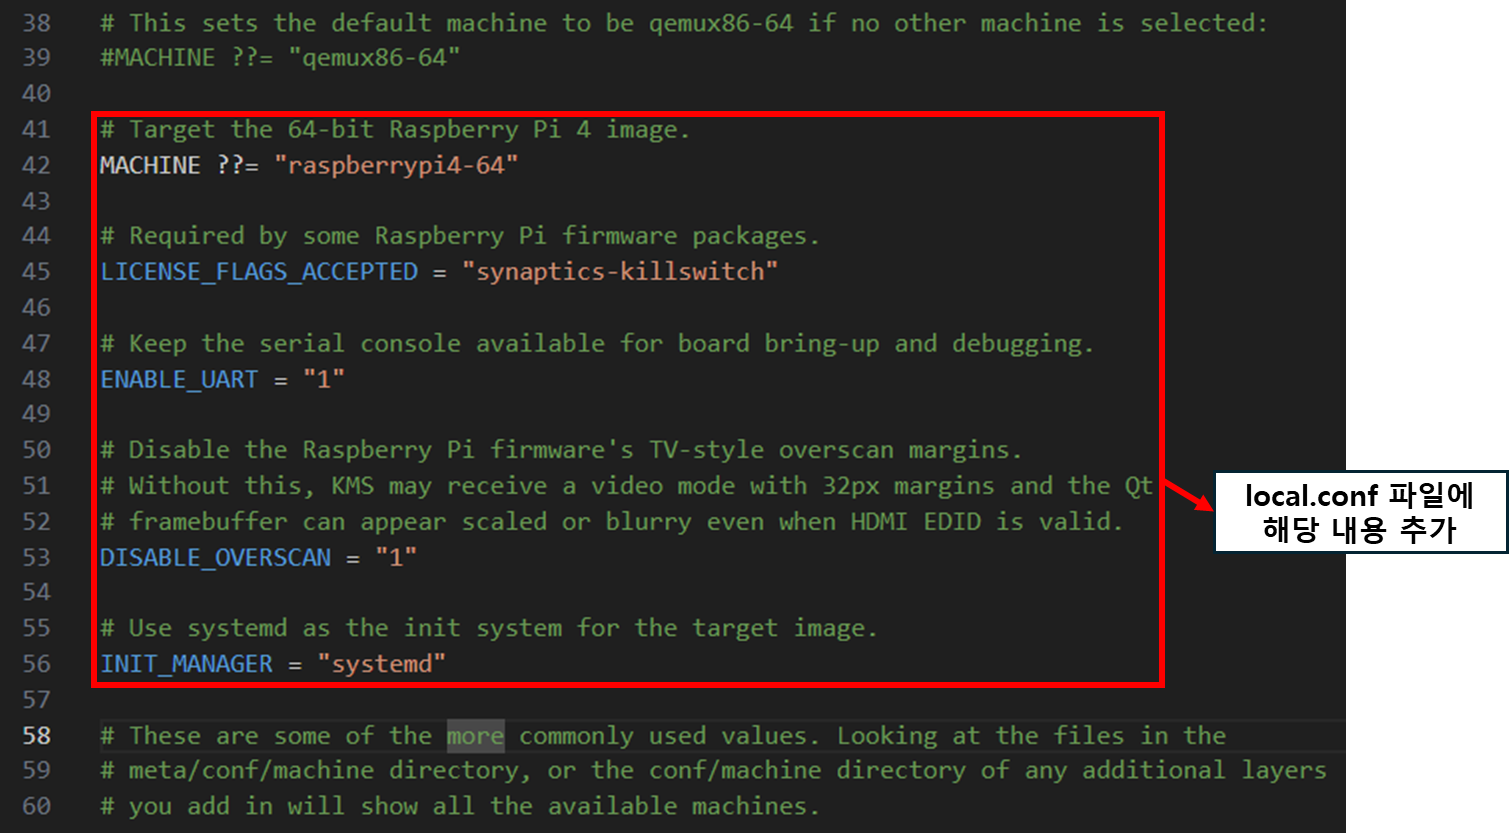
- MACHINE ??= "raspberrypi4-64"
개발 타겟 보드를 설정하는 변수입니다. - LICENSE_FLAGS_ACCEPTED = "synaptics-killswitch"
라즈베리파이 관련 펌웨어에서 라이센스관련 변수입니다. - ENABLE_UART = "1"
UART0을 활성화 하는 변수입니다.
특히 키보드와 모니터가 없는 환경에서는 UART로 Terminal를 사용하므로 해당 UART를 활성화 하기 위합니다. - DISABLE_OVERSCAN = "1"
해당 변수를 설정하지 않으면 HDMI 디스플레이에서 전체 화면이 되지 않을 수 있습니다.
특히 제가 사용하는 디스플레이의 해상도(1024x600)의 경우 많이 쓰이지 않는 환경이기에 설정하였습니다. - INIT_MANAGER = "systemd"
Yocto는 기본적으로 init_manager로 SysinitV를 사용합니다. 하지만 저는 systemd를 주로 사용하므로 systemd로 설정하였습니다.
5. 커스텀 레이어 추가
이제 제품을 위한 이미지를 설정하기 위해 새로운 레이어를 추가하도록 하겠습니다. 또한 저의 경우 원래 새로만든 레이어를 git repo를 새로 만들어 submodule로 추가하였지만 이번 포스트에서는 그렇게 하면 너무 복잡해지므로 submodule로 추가하는 과정은 생략하였습니다.
5.1. 레이어 생성
// bitbake 명령어 활성화
source ./sources/poky/oe-init-build-env ./build-rpi4

// 새로운 Layer 생성
bitbake-layers create-layer ../sources/meta-rpi4-qt6-template
5.2. 레이어 추가
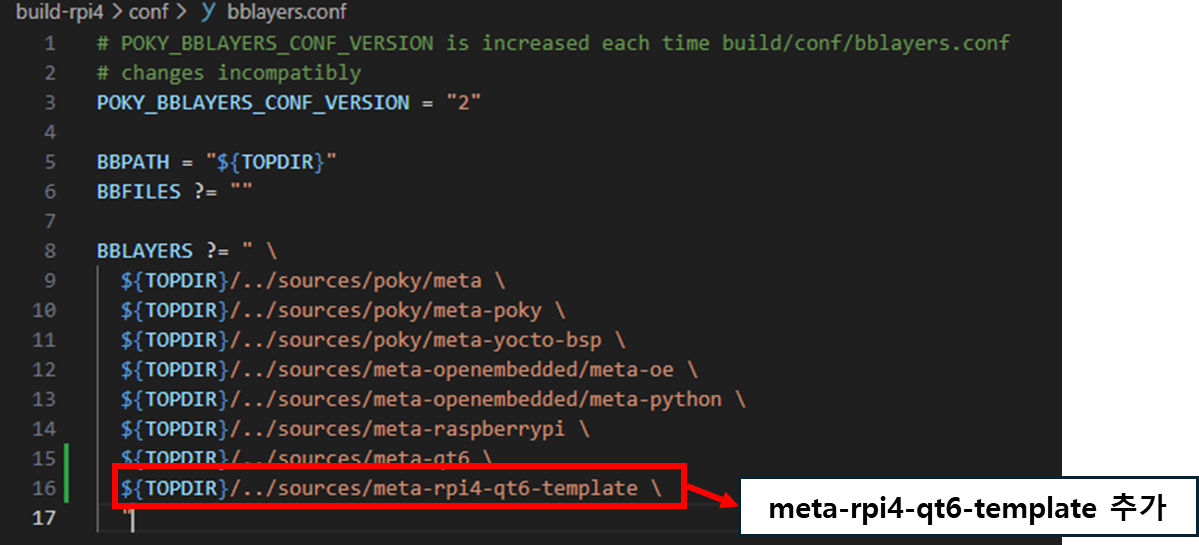
레이어를 추가할 때 bitbake-layers add-layer를 하용하지 않는 이유는 해당 명령어를 사용하게된다면 "절대 경로"로 추가 되기 때문에 github에서 다른 사람이 clone하게 되면 경로 에러가 발생하게 됩니다. 그러므로 상대경로로 추가히기 위해 직접 파일을 추가하는 것입니다.
# POKY_BBLAYERS_CONF_VERSION is increased each time build/conf/bblayers.conf
# changes incompatibly
POKY_BBLAYERS_CONF_VERSION = "2"

BBPATH = "${TOPDIR}"
BBFILES ?= ""

BBLAYERS ?= " \
  ${TOPDIR}/../sources/poky/meta \
  ${TOPDIR}/../sources/poky/meta-poky \
  ${TOPDIR}/../sources/poky/meta-yocto-bsp \
  ${TOPDIR}/../sources/meta-openembedded/meta-oe \
  ${TOPDIR}/../sources/meta-openembedded/meta-python \
  ${TOPDIR}/../sources/meta-raspberrypi \
  ${TOPDIR}/../sources/meta-qt6 \
  ${TOPDIR}/../sources/meta-rpi4-qt6-template \
  "
6. 커스텀 이미지 설정
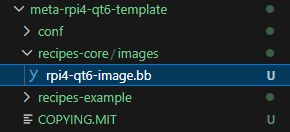
6.1. 이미지 bb 파일 생성
cd ./sources/meta-rpi4-qt6-template
mkdir -p recipes-core/images
touch ./recipes-core/images/rpi4-qt6-image.bb
6.2. 이미지 bb 수정
SUMMARY = "Minimal Qt 6 image for Raspberry Pi 4"
DESCRIPTION = "A minimal bootable Raspberry Pi 4 image with the Qt 6 runtime"
LICENSE = "MIT"

inherit core-image

# Bootable base image plus the Qt 6 runtime libraries/plugins needed by target apps.
IMAGE_INSTALL:append = " \
    packagegroup-core-boot \
    packagegroup-qt6-essentials \
"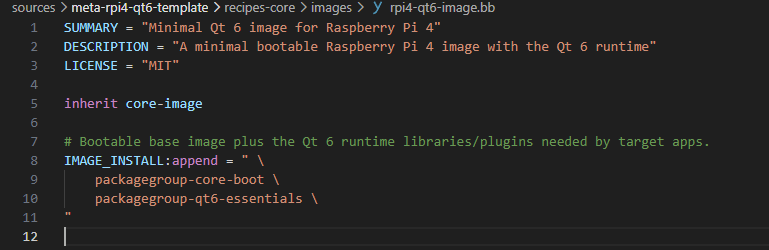
우리는 rpi4-qt6-image라는 새로운 이미지를 설정하기 위한 bb파일을 추가했습니다.
7. 이미지 빌드
// bitbake 명령어 활성화
source ./sources/poky/oe-init-build-env ./build-rpi4

// 이미지 빌드
bitbake rpi4-qt6-image
위 명령어를 실행하면 이미지를 빌드합니다.
'Embedded > Yocto Project' 카테고리의 다른 글
| [Yocto Project] QT6 개발 - 3 : QT 애플리케이션 레시피 작성 (0) | 2026.07.29 |
|---|---|
| [Yocto Project] QT6 개발 - 2 : QT Creator 개발 환경 구성 (0) | 2026.07.27 |
| [Yocto Project] KAS를 통한 개발 환경 자동 구성 (0) | 2026.06.17 |
| [Yocto Project] Github 배포하기 위한 프로젝트 구성 (0) | 2026.06.16 |
| [Yocto Project] QT5 예제 실행하기 (0) | 2025.04.10 |